Thursday, October 18, 2012

Why using alternator rather than generator?

WEEK 11

Title: The purpose of using alternator
Objectives: To clarify the importance of the alternator for this project.
                   To differentiate the alternator and the generator operation
 
Alternators
Alternators can produce much higher output than generators; current designs on produce over 160 amps. The brushes only carry current to power the rotor (about 7 amps, maximum), so they last far longer than generator brushes do. There are some disadvantages, though. The Lundell alternator requires two watts of power to spin for every one watt that it produces, making it relatively inefficient.

Generators
One of the advantages of generators was very clean electrical output, since they produced pure DC. However, all the current had to travel through the brushes and brush leads; this produced a lot of heat, and when the brushes would pass over the bars in the commutator, small electrical arcs would be produced, which shortened the life of the brush. To counter this, the brushes were made very hard, which wore out the commutator faster. Because all current traveled through the brushes, most generators had a maximum output of 50 amps.

Generators also needed a cut-out relay to disengage power to the generator when not charging. This was done so that the generator would not pick up power and turn into a motor, burning out when not being spun by the engine.

Tuesday, October 9, 2012

connection

WEEK 10

Title: The assembly of the alternator to the flywheel
Objective: To show how the alternator is rotated at the time the flywheel is also rotates.


PLANNING...

WEEK 10

Title:How to make the bike as a mat?
Objective: To determine the way this project being presented in a clear image

Content: In order to make the bike as a mat, the main thing to modify is the pedal. Imagine that the exercise bike is in the wall, and let the pedal be out of the wall. Therefore there will be only the pedal being seen by people from outside. Alright now focus to design of the pedal, to make it efficient to be used by people, the pedal must be wider that the original pedal. Therefore, the width of the pedal must be adjusted into certain width which can be pressed even people is quite a distance from the wall. At the end of it, the pedal will be look as a mat. Just by wrapping it with cloth based material or anything.

One thing to be considered is how easy people reach the pedal? The easy way is to make some stage. Meaning that there will be a stage being placed near the pedal. In reality the stage will be a platform for people to step in.

Clear image of the project

Monday, October 1, 2012

Springs and its role

WEEK 9

 Title: Springs functionality
Objective: To describe the springs' role and to determine its operation
Content:The procedure to connect the spring with the bike together with its function when the pedal is pressed.

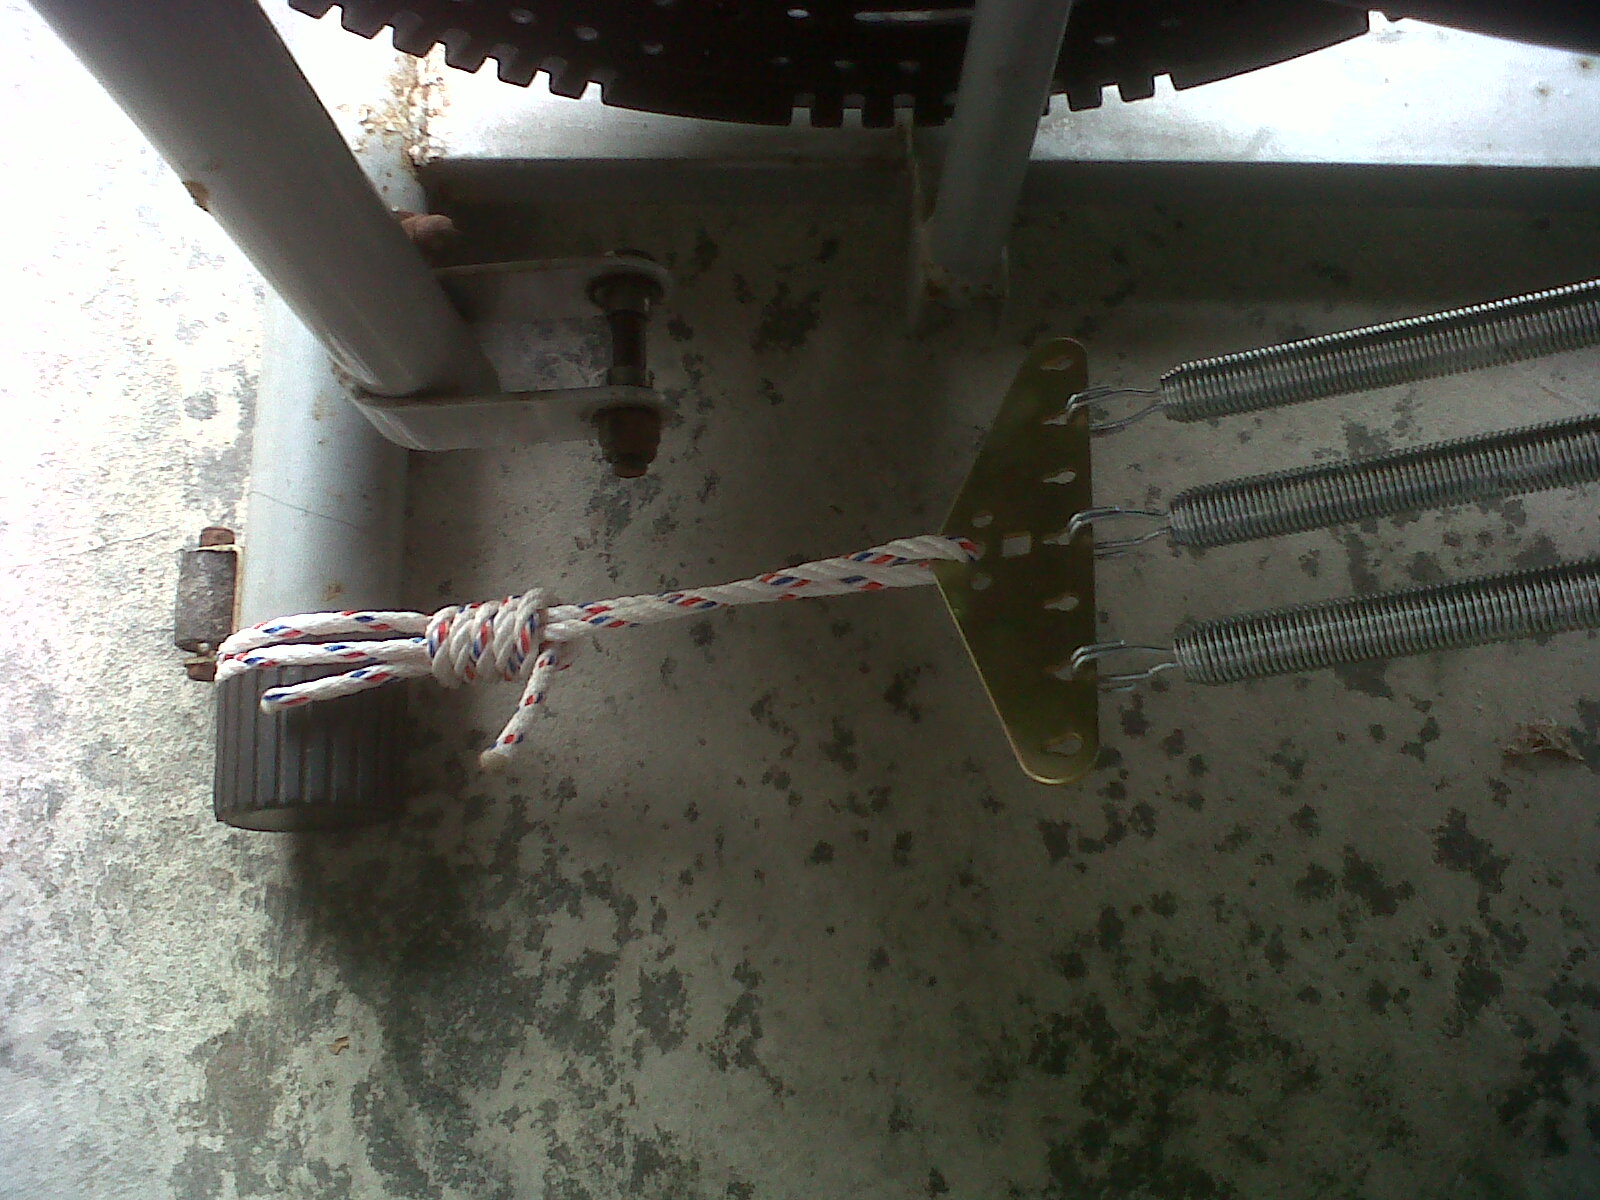
For this week I focusing on the design of the power pedal. But before that, the exercise bike must be modified into something that I want in to be. Therefore, the first thing is I want to connect the spring to one of the exercise pedal. How I want to connect the spring to the pedal? First of all, I will remove the pedal's base as you can see at the picture of the left side the one which is black in color. By removing the base, only then I can make the pedal holder to hold my spring. Alright let see the picture below....
Modification of one side of the pedal
From the picture when the base is removed the thing left is the pedal holder. Now, I will place a hook onto the pedal holder. The hook will hold the springs. But in order to make sure the spring is strained enough therefore I will fasten a rope to it from one end of the exercise bike. The spring will be like below....

 
How the bike is operate when the springs is being connected? The video shows that when the spring is presence, it forces the flywheel to keep rotate but in different direction. The rotation with presence of the springs is much higher than without the springs.  

Analysis: The advantage is that by pressing the pedal once the flywheel will rotates as much possible according to as much as the given pressure while pressing the pedal. As a result, the springs helping the flywheel to rotate more and the time period of the flywheel to stop rotate will be long. 


Saturday, September 29, 2012

Charge controller- Is it necessary?

WEEK 8

Title: charge controller
Objective: To know how much this project need the charge controller.
Content: Remember the previous post where I have given a link that contribute to develop this magic mat? As I go through the web page I saw some interesting component that may used for this project. The component that I want to discuss is the charge controller. Look at below description regarding the component. 

Q: WHY SHOULD YOU USE A CHARGE CONTROLLER TO CHARGE YOUR LEAD ACID POWERPACK BATTERY WITH SOLAR / WIND / PEDAL POWER?    

Short & Easy Answer: Because if you pedal too fast and generate too high of a voltage from your bike generator, you could dramatically shorten the life of your battery / powerpack.basic pedal power charge controller configuration

Longer more technical answer:  Your battery / power pack has a limit on how high of a voltage it can see while charging.  One term to describe this voltage is called the "Peak Charge Voltage".  If you pedal too fast and generate too high of a voltage, then you could exceed the peak charge voltage and supply your battery with too much current.  This would damage the cells inside and affect their ability to take a charge. 
 In most cases the peak charge voltage for a lead acid / AGM (absorbed glass mat) battery / powerpack is somewhere near 14.8V DC (V= Volts DC= Direct Current).

Analysis: But here, I wondering that the charge controller really can be used for this project. Is it necessary or not? I hope right after this project is work out then this question will be answered, depending on the value of the output comes out.

Reference:  http://pedalpowergenerator.com/PPG-12-200-nc25a-charge-controller.htm

Monday, September 24, 2012

Mechanical Part

WEEK 8

Title: Pedal and Generator
Objective: To determine the basic operation of the project.
Content: Let be clear. This project is more toward the mechanical part. As it consumes more on power pedal, therefore I must concentrate on the pedal itself. Pedal power is the transfer of energy from a human source through the use of a foot pedal and crank system. As we can see, the image that I provide is about two different thing. But this two different thing is totally related to each other. The one is the pedal system and the other one is generator or alternator.  The basic operation of this project is when sufficient amount of power is applied by means of pedal's pressing through pulley and belt, then it provide a continuous reaction toward the shaft of alternator. At the same time, the flywheel continue to rotate in presence of the spring. Thus, the system will not require much input power, but only a few touch to it. 

Analysis: The image shows that 1 turn in pedal power provide 4 turns in generator/alternator. It gives a greater output at the end.
Pedal Generator
Operation of power pedal

Monday, September 17, 2012

PICTURES

Title: Progress...
Objectives: To select the suitable component to do this project

Content: This project require a basic things as mentioned previously in my post. Without those things this project will not be conducted smoothly. Alright below is the image of the spring I found at the same place of the baby cradle is sold. I also bought the hook so that I can place the spring onto it. Besides, i also bought the car alternator where I found it at the car workshop. Meanwhile the pulley and belt are hard to find. Seems i have to buy it at the internet. Therefore, I had found one in mudah.com which is suitable to be fitted in this project. Whereby it come out with the flywheel and pedal. 

exercise bike
car alternator
spring